I actually started this post on November 19th and worked an hour here and an hour there until completion.

Shellie noticed this wallhanging in the background on one of our Zoom Lunch and Shmooze meetings.
This was a piece I made as a monthly 12" square challenge I made in a quilt art group I belonged to several years (perhaps already more than a decade) ago. I discovered this one while =-for something else. I know I made at least one more - it was shades of mauve and purple.
So I am about to revisit the technique, make a new one using materials from my stash, and make a demo post for anyone interested.
It starts with 16 3.5" squares. I am using duppioni silk from my stash and I am backing it with lightweight fusible interfacing to minimize fraying.
I cut out the interfacing 3.5" squares
and ironed them onto the duppioni silk.
Then cut out the silk squares and laid them out in a 16 patch (4 rows of 4 squares).

The exposed squares will be a 9 patch. Decide which squares will be the 9 patch.
Sew the squares into 4 rows of 4 squares.
Take the row which is not in the 9 patch and cut it in half lengthwise and place one half above the 9 patch rows and one below the 9 patch rows.

Now sew the five rows together.
You are almost there. Once you have the block, cut the right hand column in half from top to bottom and place the 2nd half to the left of the 9 patch.

You have now completed the base block., with full squares in the middle and half squares around the perimeter.
Of course, measure twice cut once didn't work. When I cut the side piece in half, I didn't take into account the 1/4" seam already sewn so the side pieces were out by 1/4". I remedied this by cutting 1/4" inch off the other three sides et voila - an 11 3/4" block...
Next step is batting. I had some pieces of batting cut from other projects and sewed them into a square slightly larger than the block. They were a little wonky but I don't think it will affect the finished piece.
I placed the block on top of the batting.
I then cut a piece of organza (I think it is synthetic organza) also slightly larger than the block and placed it on top of the block.
I then sewed this sandwich along the seam lines in a grid.
Now the fun part.
The organza is cut in each square along two sides and then folded back into a triangle.
I used scissors to cut so the organza edges are a bit rough.
Better to use a seam ripper, but make sure not to cut into the under
layer or through the stitches. I guess a bit of masking tape could make
a stopping point and then easily removed.
The direction of the triangles is not that important. If you alternate so the triangles are on the top or the bottom, to the left or to the right, great. If you screw up (like I did on the last piece I made) no one will notice (I didn't notice my screw-up until today...)
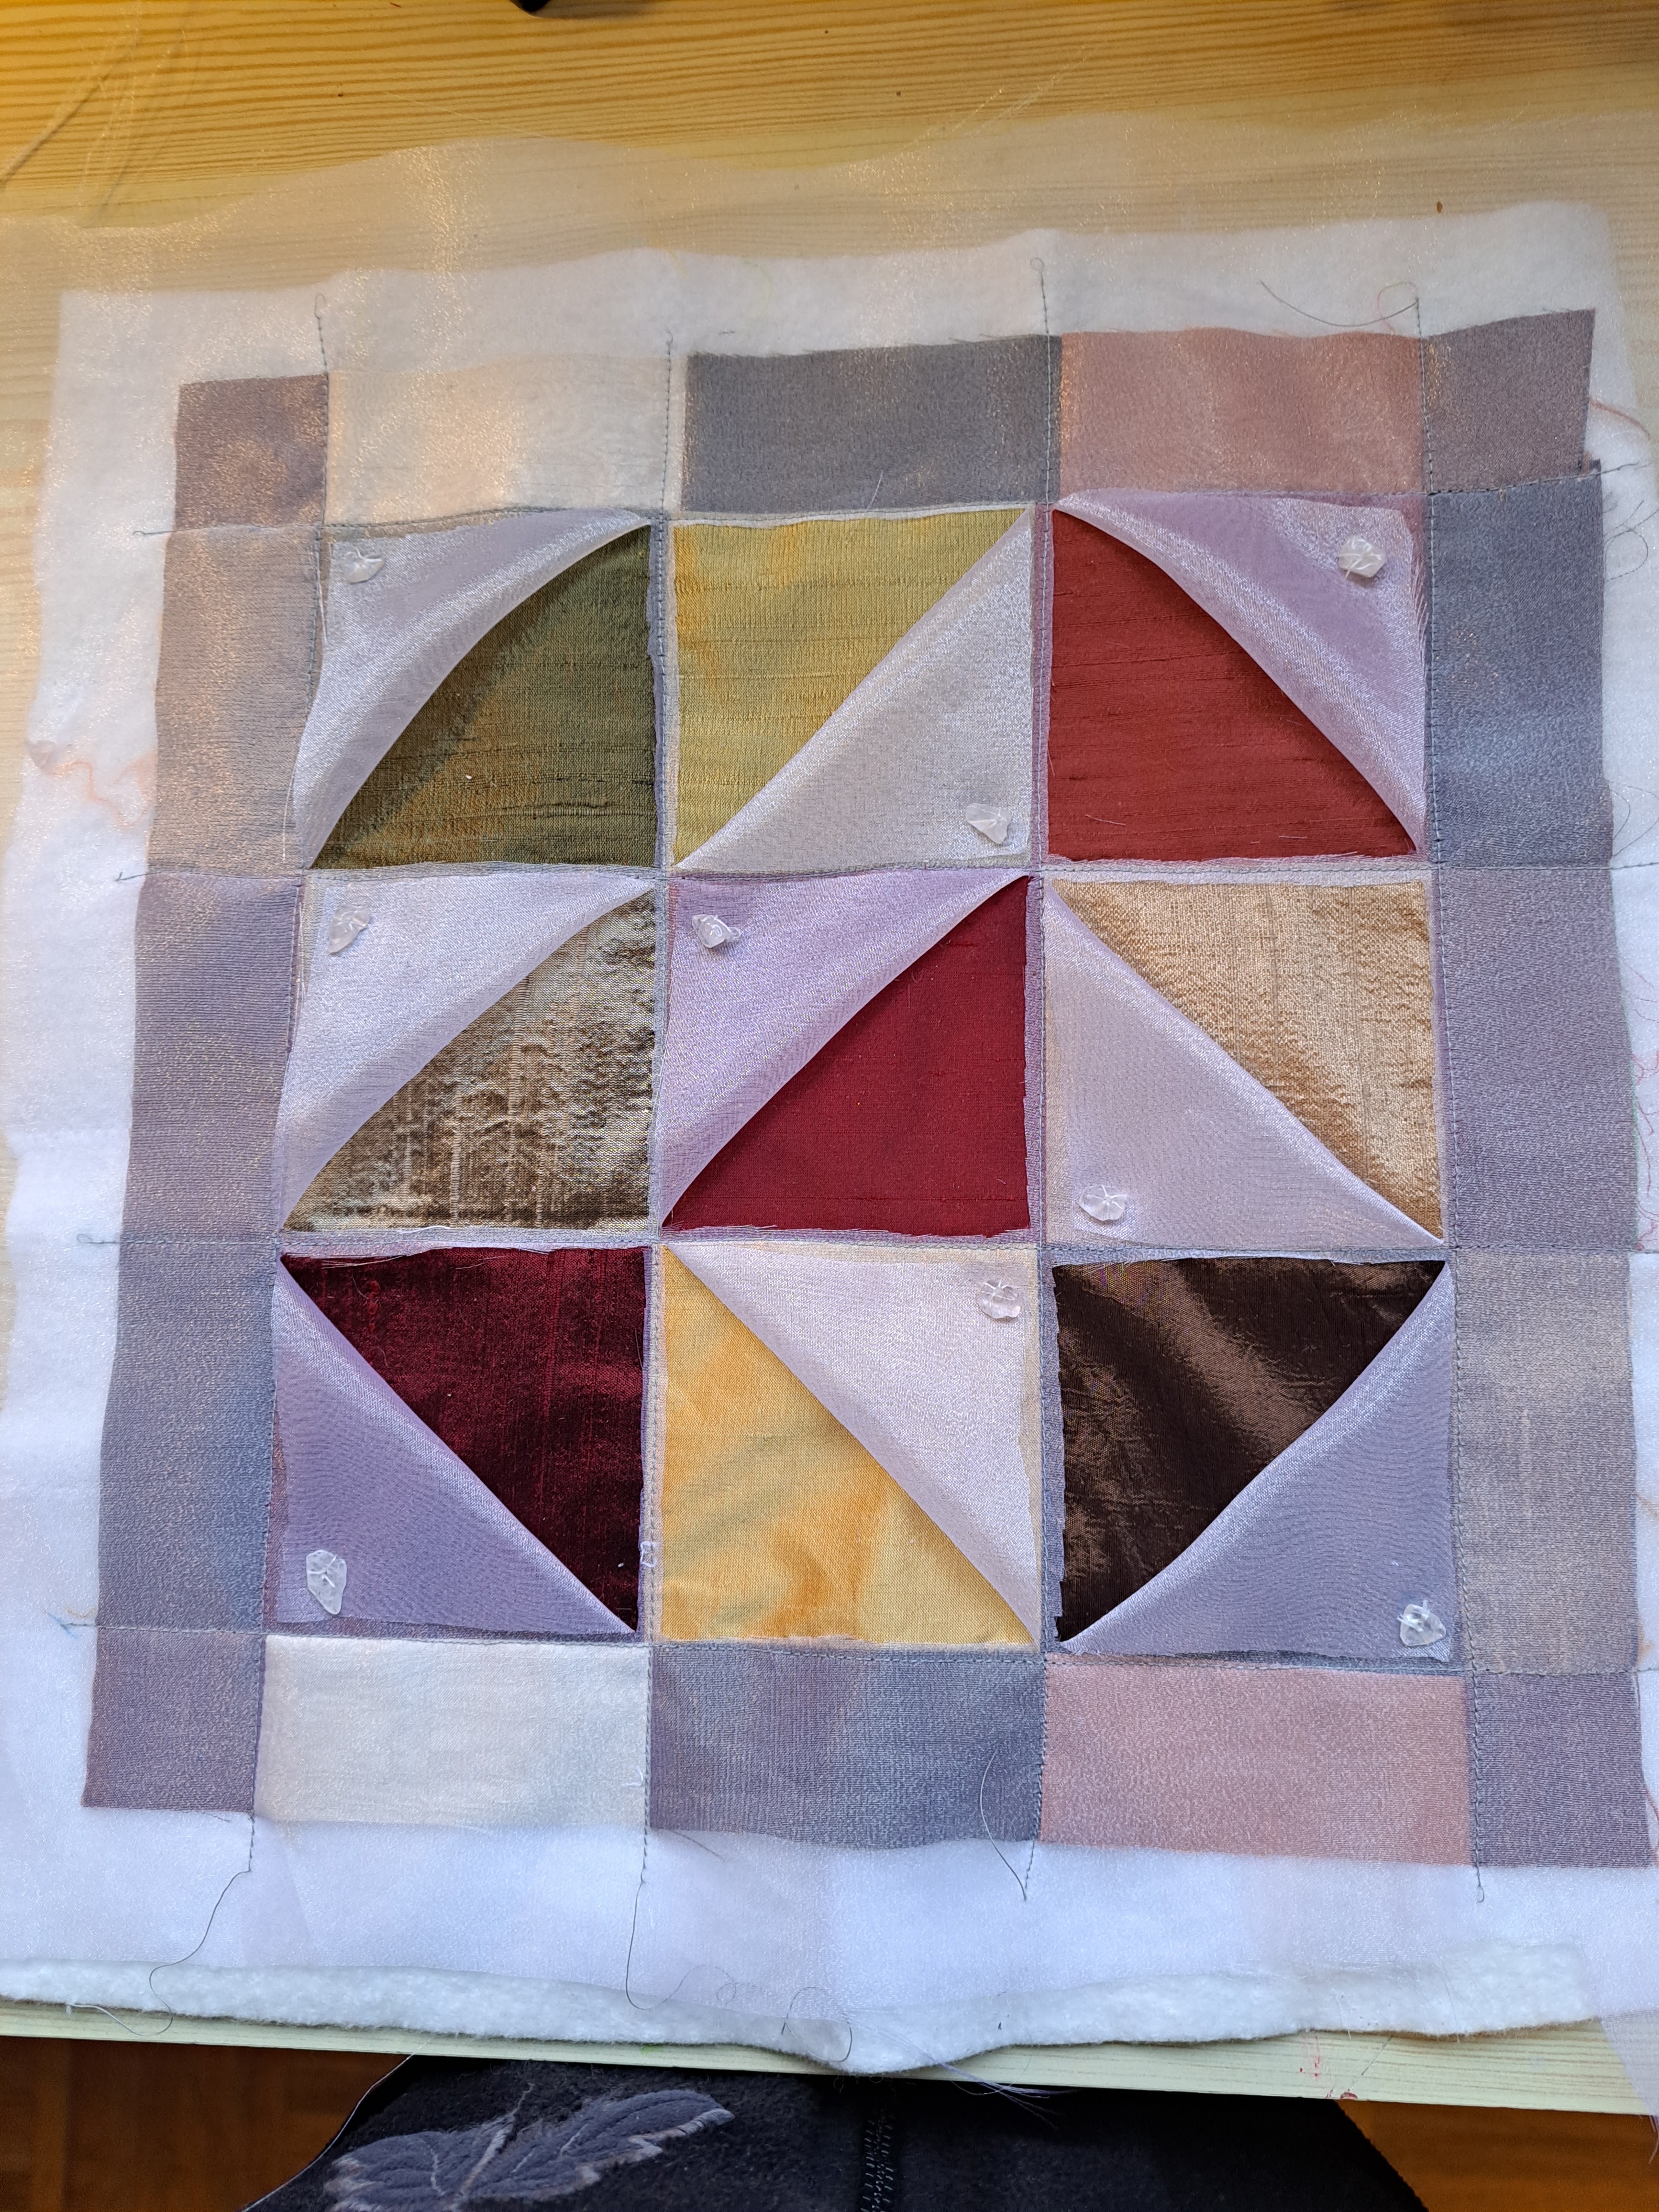
And here is the piece with organza triangles folded back.
I spent about an hour auditioning bits and bobs to place in each exposed triangle. I have findings which I purchased and pieces of deconstructed jewelry. This part is time consuming because you don't want one triangle to overpower another or the items not compatible one to the next. I tried the buttons but they didn't look good (too big).
And this is the layout I decided to use.
Some of them are not terribly visible on the lighter fabrics but I will attach them with embroidery thread and/or beads and that should make it better, I hope..
Triangles tacked down.
Revealed triangles with findings attached with beading or threads.
Chose a backing fabric from upholstery samples picked up at Guild meeting years ago.
Then I quilted the quilt sandwich with zigzag stitching. I first tried the zigzag in a contrasting thread but decided that less is more and just used a silver grey thread. I zigzagged on the previous seams except for the outer border.
I quilted before I stitched the perimeter because I wanted to add triangle corners on the back so a dowel can be inserted for hanging.
I zigzagged around the perimeter, twice. Unfortunately, there are some places where the batting shows to the front. I will look for a grey Sharpie to colour them.
Finished front.
Finished back with hanging triangles.
Then a "haircut" to cut off any organza frays or other fabric fraying.
Et voila - onto the next project.